

The best Intel Core i5-9400 Processor 6 Cores review
The best Intel Core i5-9400 Processor 6 Cores review
FOR
Leading game performance
Discounted price compared to vanilla Core i5-9400
Flimsy bundled cooler is better than nothing
AGAINST
Disabled graphics
Locked ratio multiplier
Big price-to-performance disadvantage compared to AMD in threaded workloads
Specifications
Intel® Turbo Boost Technology 2.0 Frequency (GHz)2 4.1
Base Clock Speed (GHz) 2.9
Cores/Threads 6/6
Intel® Smart Cache 9 MB
TDP 65 W
Platform PCI Express* Lanes Up to 40
Memory Support Two channels DDR4-26662
Chipset 300 Series (including Z390)
Integrated Processor Graphics No
 the NVIDIA GTX 16:50 now this laptop that's the lowest it was selling for right now I think it has one big weakness so it's really bottleneck is the CPU it has an Intel Pentium Gold g54 20 and that's an oaf Jun CPU but the great thing about this particular laptop and something we don't see anymore really is it has an upgradeable CPU and in fact is a desktop soccer that's got in there it's the LGA 1151 that you'll see and lots of this top motherboards of course with Intel so what I decided to get I'm
 taking a bit of a risk here I don't even know if it's going to work but we'll find out in this review of course is a core i5 9400 now this model has the CPU six cores so we're gonna go from two cores to six cores will the power supply handle it will we run into thermal throttling power limit throttling will it overheat will it even post will it even boot I don't know but the supply said to me that yes it will take ninth gene CPUs and 8th gen ones so let's find out this review hopefully
this is going to have a great outcome I'm really looking forward to this so if you don't see that first video again I did remove the rear cover and showed the internals I quickly and briefly show it right here so you've got six screws on the inner cover which I have already removed so they're just all around here and this simply just prized up there's a little point right here we can get your finger in and then you just pull it straight up and clip around the edges to here and
that comes off and you get really good access to all your upgradable components so that is the wireless card that we can upgrade to an intel gigabit one I highly recommend the Intel wireless AC 90 to 60 with Bluetooth 5 it's a very fast card you can add another PCIe SSD or set a 3-1 right here 20 to 80 in size there are the two Ram slots so you can see right here but what we're going to be focusing on of course in this review is the CPU here so here's the slot so the LGA the one one five one and what I've done is already undone all the screws right here so they have
been removed now I thought this might have been soldered on and because it's under the plastic here but I'm gonna have to remove this outer plastic but it turns out that I could just see now a thermal pad is right here connecting and transferring some of the heat from the GPU also to the CPU so with two copper thermal transfer heat pipes here they are very large ones as you can see and the larger fan is L CPU fan too here so there's two screws done both undone both of those right here and remove them so in theory hopefully if I'm not forgetting about a screw or
this one hidden this should now lift up so we've got the thermal pads here and this hopefully I can pull okay there we go that right out and you can see the thermal paste that they have used does seem to be pretty good and they've done a good job there too with pasting that and they haven't gone overboard as well okay so I've just quickly given this a wipe I've got rid of all the thermal paste that's on there because I just don't want to get it over my hands otherwise it'll end up all over the plastic and everywhere so if you work on desktop PCs this is all gonna be
pretty much straightforward to you you've got this clip right here you could say like a spring this is applying the pressure here keeping the CPU in place so you just simply need to pull this out from one side and then that goes it should just pull up and there we go we now have access to that CPU so you can see there's a tiny little arrow here that aligns with the motherboard of course that's what we're going to have to look at when we install the new CPU the core i5 so this we can simply take out quite easily make sure you're not touching your cat your dog or
anything like that static electricity will kill these components that are around here so make sure you earth yourself as well if you can so here we have the new CPU so it's the core i5 9400 as mentioned so just gonna take it out of this and make sure they're aligned that little arrow in that corner and slot that in place you can't actually put this in the wrong way so there we go that is fine it's in place and you simply need to just repeat this process here of getting that make sure that is underneath that screw there and then push this right down and then we have that
CPU installed in place very easy to do now we're gonna have put some thermal paste on okay so now I'm just cleaning up now the old thermal paste so I've just put some Arctic clean on here you can use various other different cleaning products and that's just to remove all the residues left from the old pace there behind some when we put the new paste on that cry or not now to apply the thermal paste so use whatever method that works for you I normally just put it on
there and spread it out evenly and that has always worked for me I've been doing this for years of being building pcs for years but everyone is an expert when it comes to this I mean just look at the comments just read some comments right now but with the cryo not the from thermal grizzly they do recommend that you spread it out so I'm just going to put a little bit the middle so you straight away people going to say you're not using it now if you're using too much I think that much to start with I'll spread that out and see how I go now I think that's going to be enough so this is the little spreader that they give you so you're supposed to just spread it out
evenly and it doesn't actually spread as good as I'd hope so I'm actually gonna need a lot more thermal paste as you can see this is not looking pretty and I can see people in the comments screaming already you're doing it wrong in fact it's most of it's getting stuck on this so I'm definitely gonna need a little bit more thermal paste okay so I'll put about half a tube on there which is probably way too much but a little bit of excess that'll just spill out to the sides anyway won't matter and I'd rather put on more than not enough also applied a little bit on the top here Finley using the spreader doesn't spread out quite as good as I'd want but as mentioned
use your own method if you want to just put a pea sized dollop in the middle then do that so time to fit the cooler back so make sure you've got the cable not trapped underneath the fan or anything silly like that so you want to slot this in first the cooler the fan okay and then just drop this down in place right here so we've got the screws they are numbered which ones you need to screw in first and you do it in that order so that is the heatsink and the copper pipes and the fan all back in place everything's screwed back the repai ston there when well I think I can't see
huge amounts using out the side or anything in fact I can't see anything coming out the sides of it just taking a peek I think oh yeah I might have gone overboard a little bit with the paste but it's gonna have good coverage on the top of that so now we're going to test and see if it's going to boot that's not my biggest concern my biggest concern is wool this color and the two large copper transfer pipes here be enough to cool a desktop CPU in a laptop let's find out okay let's do this I must admit I'm nervous I don't want to have to go back in there and buy another CPU
like a core i3 input in this otherwise this video is gonna be a bit of disaster so powering on oh that's a good time logos come out whoa all right okay it's working all right so the fan is on quite a bit you can hear it the fan is working harder than it did with just the two cause before as expected we've got four additional calls here but look at the temperatures sings very good it's stabilizing around the mid sort of late 60s which is good I think the highest it's got up to is 69 degrees which i think is excellent and you can see it's holding across all six cause three point
seven nine gigahertz so it's three point eight and that is really good there is no thermal throttling or anything like that that has been triggered or even power limit throttling but I'm gonna have to stress of course both the GPU and CPU which I will do next okay so there's a massive improvement here the fan noise is as it was before gets a little loud gaming no changes there but look at this performance increase so that's the old score and this is the new score Geekbench four have a look at that huge change absolutely massive of course going from the
two cores the four threads to now six cause is a massive step up there and the the turbo as well is quite a bit higher at the 1.4 and we take a look now at fire strike so that's the original score there the 7180 six is now graphics scores 9180 six is now 10,000 graphics score because I overclocked the GPU a little bit as well but take a look at that physics score which was over double it's now twelve thousand two hundred and eighty six giving us a score thereof close to nine thousand which is really really good considering what this originally was getting so that is
super quick and for those interested times by a score of almost three thousand nine hundred graphics cortez 3726 cpu score is 5222 really solid score so thermals and power limit throttling this is over the last hour or so that I've been gaming pushing it hard and you can see that no power limit throttling no thermal throttling starts handing it really well maximum temperatures according to HW info which I have been running as I always do in my reviews is 76 is a core max really really good I do believe that you could probably get away with putting
an i7 9700 in this not the cave version you want the 65 watt one and in the GPUs maximum if I scroll right down where is it GPU is actually being very cool as well 64 degrees you can see there so very good temperatures those NVIDIA GPUs tend to run quite cool so no problems with that that's why I think there is Headroom just a little bit for an even faster CPU in this which would be crazy now there's also as you'd expect a massive huge difference in the Cinebench r15 score so the original CPU that came with 351 C be nothing amazing rather low
and now it is close to 1000 as you can see here posting 931 C B so a really good improvement there I'm really happy with the results I'm taking a look here at Witcher 3 again if you saw the first video I ran into the same exact area same settings at 1080p medium settings it dipped down to 54 frames per second the lowest it just got then was 81 now I have overclocked the GPU a little bit here so I've got about 120 on the core clock and the RAM I have boosted up 950 megahertz so that also is making a big difference so this is now the maximum performance that
we can squeeze out of the 16:50 in its current state of course with the new six core CPU has made a huge improvement here to gaming just making that framerate just so much more stable dipping down only really about 10 frames per second and instead of dipping down about 30 as it did before because it would go down to 54 and it was averaging around about 80s so I say on average we're gaining probably about 10 frames per second more here from both that overclock and the new CPU so GTA 5 1080p absolute maximum settings that I have set here if you take a look at the graphics I have all the population density varieties scaling distance very
high high reflection actually this is could be on right here absolute max kind of settings and you'll see that it's running really quite well considering the GPU we're getting around 50 frames per second average and of course the graphics does look very good there's a little bit of screen tearing here there are poor to turn on vsync but these kind of games aren't gonna be able to take advantage of that 144 Hertz you're gonna have to play older titles like Counter Strike global Offensive for that let's take a look at how it performs so this is Counter Strike on
the maximum settings and it's running you can see an average of about what a hundred and sixty frames per second it's over the 144 refresh rate so this game just looks super smooth and it's running really well however let's see what happens when I start the new round if it's gonna actually dip below 144 well so far it hasn't so look I mean it's just hitting this perfectly now with that upgraded CPU so if I set the vsync on that'll be ideal keep it at the solid 144 Hertz matching the refresh rate alright guys the results speak for themselves don't they it worked out I did not expect to have this outcome I didn't expect me to be sitting here with a heavy face
smiling I thought it would probably be the end result being hey guys I had to put the a Pentium Gold CPU back in there because it didn't post it didn't bode or it didn't handle it just got too hot ran into problems now I've done a lot of stress testing on it so far I will continue if I do run into any problems I will pen a comment at the top of this review if it does just completely die on me I don't expect it because the manufacturer said that yes it can handle the ninth gen CPUs it does have the H 700 a sorry 370 chipset in here and you can use eighth gene chips a -
apparently in this so if you're looking at the youth market you want to get a cheap upgrade find a used core a5 an eighth Jim one throw that in here and then you can really open up the performance so it has increased the gaming performance as you saw dramatically the CPU performance has now more than doubled there's no power limit throttling there's no thermal throttling the power supply is fine the thermals the fan noise everything is really good it's not getting any hotter than it did before with the dual cores so the thermal pace Grizzly's cronin
works really well okay maybe my thermal paste job my application method maybe not the greatest you probably don't agree with me but hey I gained the results they do speak for themselves their thermals did not go over the CPU doesn't go over 76 degrees which is really great .
The best Intel Core i5-9400 Processor 6 Cores review
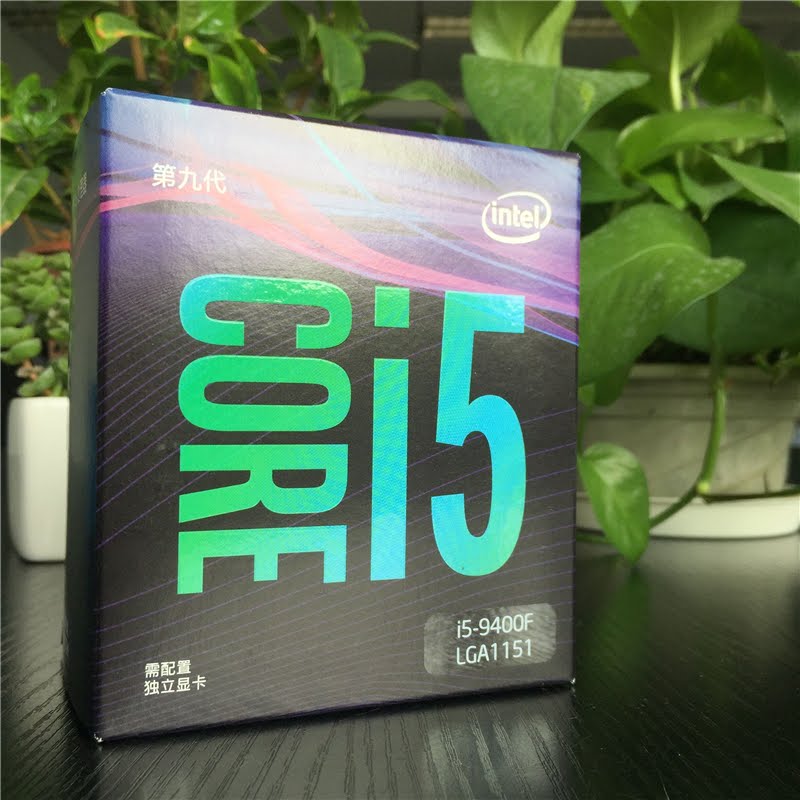
Learn more about Core i5-9400F
ModelBrandIntelProcessors TypeDesktopSeriesCore i5 9th GenNameCore i5-9400FModelBX80684I59400F
DetailsCPU Socket TypeLGA 1151 (300 Series)Core NameCoffee Lake# of Cores6-Core# of Threads6Operating Frequency2.9 GHzMax Turbo Frequency4.1 GHzL3 Cache9MBManufacturing Tech14nm64-Bit SupportYesHyper-Threading SupportNoMemory TypesDDR4 2666Memory Channel2Virtualization Technology SupportYesPCI Express Revision3.0Max Number of PCI Express Lanes16Thermal Design Power65WCooling DeviceHeatsink and fan included
The best Intel Core i5-9400 Processor 6 Cores review


To find out more from Amazon link below


Post a Comment