

The best Cooler Master Hyper 212 LED w/ 4 Continuous review
The best Cooler Master Hyper 212 LED w/ 4 Continuous review
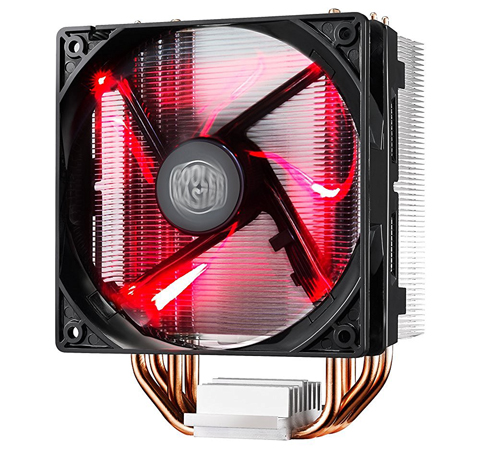
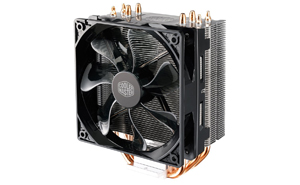
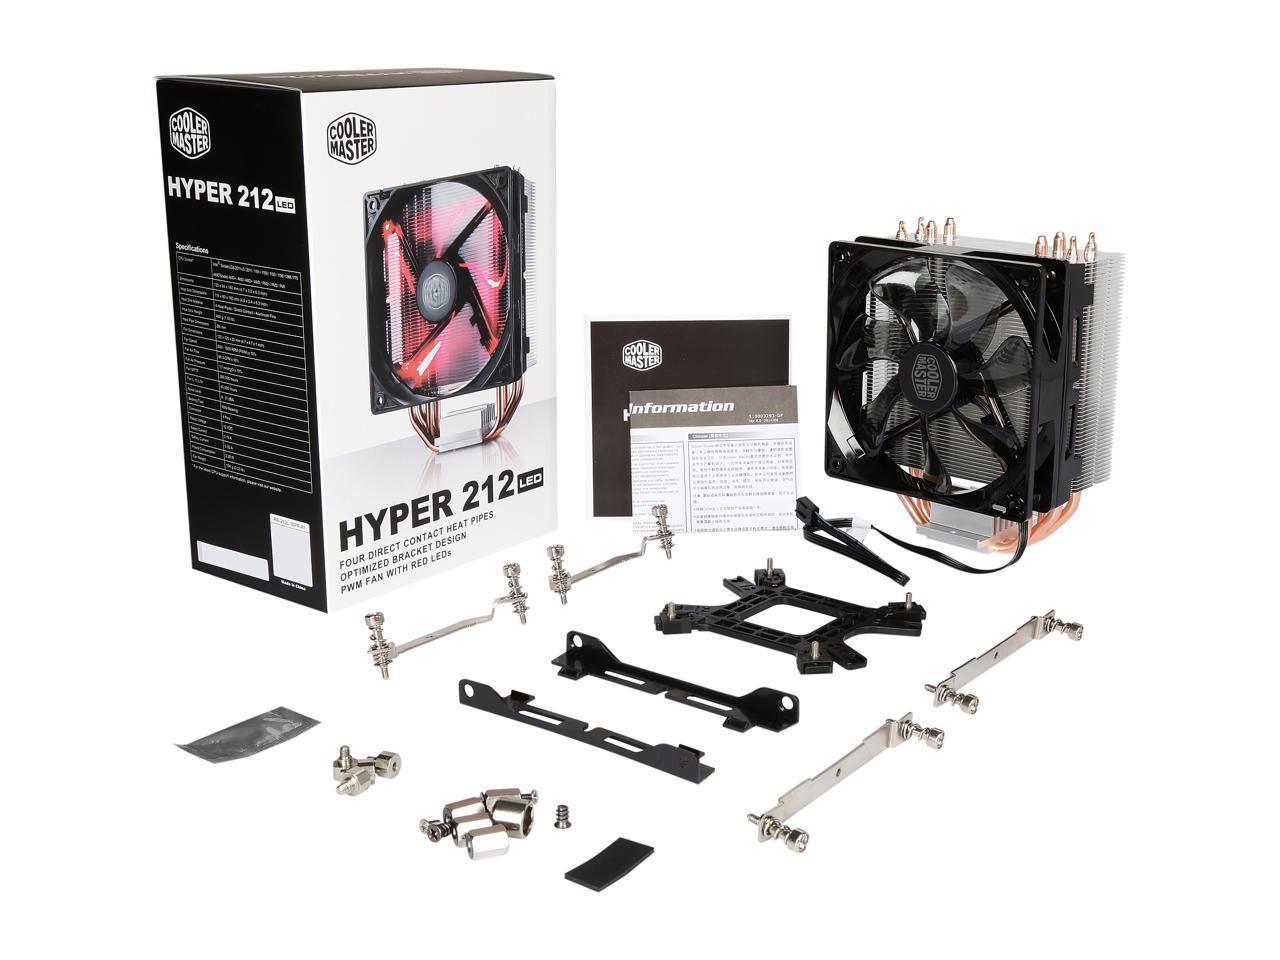
Upgrade the cooling performance and style of your power house with the Hyper 212 CPU cooler, which delivers a great blend of form and function. Four direct-contact heatpipes with perfectly spaced fins deliver optimized conductivity, and a 120mm PWM fan delivers voluminous airflow while keeping noise in check. The white LED steals attention instantly when your rig is powered on. Installation can be quick and easy, thanks to the smartly designed bracket, which supports both popular Intel and AMD platforms currently available.
Highly Effective Cooling
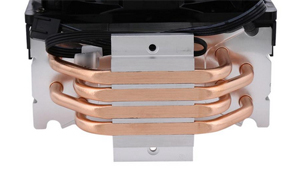
Four Direct Contact heatpipes draw heat away from the CPU quickly.
User & System Control of Fan(S)
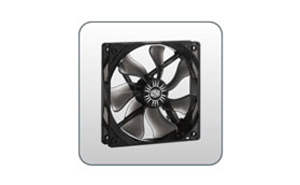
A wide range PWM fan with unique blade design can be controlled by changing its settings through supported systems or software to suit your noise and performance needs. The red LED adds eye-catching fun to your power house.
Quick Snap Fan Mounting
Utilize the included brackets to quickly add or remove fans for upgrade, replacement, or maintenance.
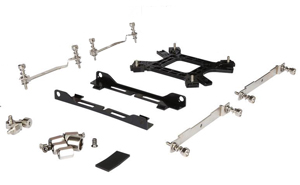
Universal Mounting Solution
It supports the latest sockets from Intel and AMD. The optimized bracket design allow for easy installation.
today we're going to be taking a look at the cool master hyper 212 LED CPU cooler quite a mouthful so I decided about time to actually upgrade my cooling situation because recently I came across this msi z170a crate gaming motherboard for my CPU and the cool thing about this is this is a Z series motherboard which allows me to overclock my I 560 600 K now just taking a look at it this is the stock cooler for Intel CPUs now very impressive gets the job done but if you want to do any form of overclocking which this board is designed to do and what I
want to get into do you definitely need better cooling or you're just going to you know fry your CPU which you don't want to do so that's why I decided is time to upgrade to this so let's go ahead and open this bad guy up alright let's check this bad guy oh man thing is hefty now let's just take a second to admire the difference in cooling capacity so one it's got a huge fan compared to the stock one and you know this is the heatsink that presses down upon the CPU there and this one actually uses heat punch let's go ahead and remove this so we don't forget to
do that at a later point so this part is what actually makes contact with the CPU these are copper pipes here draw the heat away Center that up a little bit so it draws the heat away through these copper pipes and comes into these bins here which is massive massive compared to the heat fins on this guy it's a lot more a lot more area to cool which should allow for way better cooling situations and you know the large fan here blowing across it should keep our CPU nice and cool plus this fan here actually has a red LED as you can see in the box there I
wish I had blue but I'm ok with red you know my case and is blue my system is white with this being red it'll be you know red white and blue kind of cool so quite a big upgrade all right now I got everything set up so here we go we got our new cooler got the support bracket that goes on the backside of the motherboard got them on the board already cleaned off all the old CPU paste cooler paste we got the two angle brackets which are used for the Intel motherboards since this I 560 600 K it's the LGA 1 1 v 1 socket so I went ahead and pulled out the hardware
we needed for Intel then you got your 4 standoffs here and then this thing's pretty cool is it's the standoff tightener just kind of cool you fit it on there and got the Phillips head on that side we got our two fasteners right here that actually attach this to our CPU cooler to mount it cocked our number two Phillips and some CPU paste I went ahead and I'm not going to use the one that came with it you know it does come with some but go ahead and use my own all right so first things first we remove the sticker that was on the base here so let's go ahead and prep
this guy for the install so you see these two countersunk holes on the bottom here so what you're going to do is go ahead and actually first things first let's go ahead and remove the fan so you got to be careful got these two little tabs here and here I guess they're really easy to break so you just want to lift them up kind of carefully make sure they don't pop back into place that's good set that in come on there we go so we're going to go ahead and pop that off and set that out of the way that way we're working with just the heatsink itself so first things first what you
want to do you don't take this guy again get that centered up here so we're going to make sure you want these screws facing down so we're going to go ahead and line it up with the hole check it to the bottom there I'm going to grab one of our little countersunk fasteners go ahead and stick that in there ahead then okay yet come on there we go are all lined up OOP go ahead get it decently tight right now we got that on in place flip it over do the same thing to the other side make sure these are facing down line up our whole defense are in there tighten it down OOP
Wow good thing I was paying attention you guys can make fun of me in the comments below as I just said to make sure these are the standoffs are facing down here we go almost installing it upside down all right ah see there we go now we're now we're good okay I should okay it's nice and tight sure that's nice and tight all right now that that's done we're going to actually come over to here and on the instructions here right through yet ah so right here on the instructions there we go tells you that center hole is for the LG one our LG a excuse me one one 5x socket
series so since this is one one five one we are going to have to adjust each one of these stand out here to the center hole so what you're going to want to do is you're going to want to pull out or push either way and you're going to want to slide it make sure it ends up in the center hole right there so make sure we do that each one of these spring-loaded so once you pop it out you can kind of slide it along till you feel it pop into place all right that looks good those two good it's pretty easy there we go too far there we go come on there we go all right so this one is pretty
much good to go the next step though is we're going to have to put the support racket on the backside of the motherboard there so this requires an adjustment of well as well depending on the CPU socket on the motherboard each side is labeled by the specific manufacturer so this can be used on AMD platform as well as Intel so right here located you probably won't be able to see it there it says AMD this side here says Intel so we actually already have these four standoff clips already installed and then those need to be adjusted as well so let's go ahead and
take a look get the instructions open as you can see right here on the instructions that's telling you where this clip needs to slide in each one of these grooves depending on what CPU socket series since we're LD a 1 1 5 X you know we're going to shoot for that Center one already are the center one but as you can see it was shipped to me already all set up that way so they're all on that Center clip spot so let's go ahead and install this as you can see you got your standout screws that are actually going to come through the back of the motherboard so let's go ahead
and flip this guy over so these are the four mounting holes that generally your CPU socket excuse me your CPU cooler would come through and attach so this support bracket what you're going to do is you're actually going to line it up and you're going to feed those through there and if you got it all set up correctly it should you know go right through and you're left with your standoff screws on this side and poke it out so what you do is you take your standoff screws can you go ahead and thread it on there right go ahead thread it on there and some good move on to this next one you don't need to do it very tight that'll be the next step so let's go
ahead and get that semi tight okay now you want to tighten in a star pattern it'll give it even pressure crossed okay last but not least top line here okay all right so this next step I'm going to go ahead and sit this just set the motherboard down be a little easier so you're going to take your little stand off screw and tighten it up by hand that's the way then you can take your screwdriver plug it in there just give it a good not too tight you don't want to crack the board but you know tight enough that you feel comfortable doing you know not too tight you
remember star pattern so you want to do like a X pattern actually so we started with this one jump across over here and you jump to this one and then lastly at that corner like I said it gives it kind of an easy even tightening pattern nice and tight lastly here go ahead and okay we're good to go all right there we go we got our four standoffs right there all set up I'm good to go get the support bracket on the back here all right our support bracket mounted on the back now that'll keep it because it's so very heavy cooler so you're going to have a quite a bit of
weight pulling on it so it's nice that they have this bracket located on the back here so let's go ahead and set that down and next up what you want to do is you want to make sure that this cooler actually lines up okay good to go okay everything seems to line up nice and good each one of these holes alright alright so the next step is your going to want to liberally apply it liberally but now you can search the internet there's our there's so many different ways people tell you to go ahead and apply your thermal paste some people say just the pea-sized drop other people say you can do an X pattern you know there's a I believe there's a really good review on -
tech tips where they actually go into different styles of how you apply the CPU paste and shows that there really isn't any significant difference or any loss of performance if you do it one way versus another you know you can't use too much unless you know you're like taking it on there and it really fills in there so we're just going to go ahead and apply a nice little part in the center nice little blob and then just a little X pattern and just drag it through that way you know it spreads it nice and evenly and right cool so that's what I did a little bit alright so the
next step sure you line up your CPU cooler all right get it all lined up and same thing you want to get it started we'll do it same thing we're going to do an X pattern so we started with that one go ahead and get this one in Kim oh yeah okay nice need to press down a little bit because they are spring spring loaded so we'll tighten that guy down a little bit once we got it started now this guy keep getting egg okay there we go okay and then last but not least stare right here and then what we're going to do is we're going to tighten this get it down okay that one's nice and
tight so now we're going to do the X pattern when we start did the final tighten to this one so we're going to come back to this top one here make sure we that one good and tight back over to this side here and tighten this guy down okay nice and tight lastly just going here okay okay feels pretty good alright then lastly go ahead and put our band back on let's see we get our CPU fan plug-in light here so that's where this guy goes and plug it right in there .
The best Cooler Master Hyper 212 LED w/ 4 Continuous review
the hyper 212 Evo Black Edition on an AM forebay system I'm gonna answer the inevitable questions that we're gonna get in the comments section before we begin so yes it has RGB yes you can install it with more than one fan yes it will work with Aurra sync and every single motherboard that has an RGB header provided you have a four pin 12 volt RGB header no you don't need to use the included RGB controller yes it will work with whatever CPU you're going to ask about in the comment section that fits on a name full socket yes it also works with Intel CPUs as well but yeah we're not covering that in this review now that's out of the way let's
finally get started we're gonna take a look at what comes in the hyper 212 RGB Black Edition box and show you the little bits and pieces that are required to install this on an AM for base system so that's a system running any of the Rison processes both first gen Rison and second gen Rison okay let's take a look at what's in the box ,these plastic brackets enable you to install an additional fan on the other side of the cooler however you'll need your own fan to do this and a backing plate which enables you to install this on an AMD socketed motherboard or
an Intel socketed motherboard but yeah we're only doing AMD in this guide let's pull out the cooler itself and have a look at this guy it's completely redesigned from the ground up and it is absolutely gorgeous the included fan is RGB and not addressable RGB let's take a look at all of the mounting hardware for every socket and pick out the parts that we're going to need for an A and fall based installation the first thing we're gonna need is four of these little guys here and four of these plastic clips next we're going to need four of these bolts and one of these to tighten
up the bolts you'll also need to locate these two brackets these straight brackets are 4 a.m. for mounting only what you'll need to do is get the bracket and put it on the inner lip of the cooler and you'll notice that it's got locating not just cut out and all you need to do is put the screw through the top and move it until it lines up at the hole and tighten it up and once you've done that side you want to rotate the cooler around and rinse and repeat and do the exact same thing on the other side of the cooler as well pretty straightforward stuff guys , if you look
closely the correct corners to put the pegs into are labeled AMD you'll want to get the four pegs and slide them as far away's they go from each other locate the plastic clips and slide them on now you might need to use a little bit of force here it's not easy the first time you do this and yet once you clip it in you should be good to go and just rinse and repeat that process on every corner and just keep in mind that the peg need to be as far away from each other as possible otherwise it won't fit through the holes on the motherboard I'm gonna show you the easiest way to actually get the backing plate installed on your motherboard what I usually do is lay the
backing plate down and drop the motherboard on top get the four bolts that I showed earlier and just finger tighten them in don't do them in too hard just yet because I'm gonna show you what you need to do to get them in properly tight you'll need the included socket which has a Phillips head on the top and just tighten it up with your Phillips head screwdriver you don't have to worry about over tightening these these will stop at a certain point so you can't actually over tighten them at all once that's done you'll want to remove the warning sticker from the
bottom I have seen lots and lots of people leave this on and they complain that their temperatures are really high so make sure you remove that locate the small syringe of master gel Pro because we're gonna put some on the IHS of the CPU to get this color all mounted up what you want to do is use a pea dot size of thermal compound now lots of different people will say different amounts but this is the amount that I have found to work properly drop the cooler onto the bolts we installed previously and just get them to kind of line up and all you want to do is grab a long Philips head screwdriver and tighten them on opposing corners this might be a
little bit tricky you'll see it's kind of lifting up here don't worry about it guys all you need to do is just do the opposing corner and you should be good to go and just rinse and repeat that process until the bolts all stop the best way to do this is just keep alternating each corner once you're done tightening everything up put the fan back on to the front side of the heatsink and we're gonna plug in the fan soap everything works locate the fan nectar plug and plug it into an available fan header on your motherboard I'm plugging mine into the CPU fan header it could
be different on your motherboard so make sure you check your motherboards manual I'm gonna show you guys two different ways to connect up the RGB to get it to work on your system the first method is just connecting it straight into a four pin 12 volt RGB header on your motherboard on this motherboard this is what it looks like it could be different on your board and the other way is actually using the included controller this is a recommended way if you're using an older motherboard that doesn't actually have an RGB header but I would recommend
using your motherboards RGB header and that's it you're all done you're all good to go and your system should be nice and cool, I think we covered pretty much everything in this review if you've got any questions feel free to head on over to our discord and drop a comment down below but before you drop a comment down below make sure you read the comment section because either myself or someone else would have answered those questions already.
Learn more about the Cooler Master RR-212L-16PR-R1
ModelBrandCOOLER MASTERSeriesHyper 212 LEDModelRR-212L-16PR-R1
DetailsTypeFan & HeatsinksFan Size120mmCPU Socket CompatibilityIntel LGA 2066 / 2011-3 / 2011 / 1366 / 1156 / 1155 / 1151 / 1150 / 775
AMD Socket AM3+ / AM3 / AM2+ / FM2+ / FM2 / FM1Bearing TypeRifle BearingRPM600 - 1600 RPM (PWM) +/- 10%Air Flow66.3 CFM +/- 10%Noise Level9 - 31 dBAPower Connector4 Pin (PWM)ColorBlackLEDRedHeatsink MaterialAluminum (Fins) / Copper (Heatpipes)
Dimensions & WeightMax CPU Cooler Height160 mmFan Dimensions120.00 x 120.00 x 25.00mmHeatsink Dimensions116.00 x 60.00 x 160.00mmWeight1.03 lbs.
FeaturesFeaturesFour direct contact heat pipes for continuous contact between CPU and cooler
Upgradable to dual fans with quick snap fan bracket
Wide-range PWM fan with unique blade design and red LEDs
Versatile all-in-one mounting solution for Intel and AMD sockets
Optimized bracket design for easy installation
Heat Pipe Dimensions: D=6mm
Fan Air Pressure: 1.7mm H2O +/- 10%
Fan MTTF: 280,000 hours
Fan L-10 Life: 40,000 hours
Rated Voltage: 12 VDC
Rated Current: 0.19 A
Power Consumption: 2.28 W.
The best Cooler Master Hyper 212 LED w/ 4 Continuous review


To find out more from Amazon link below


Post a Comment