OUR VERDICT The budget-priced CMT510 is a feature-rich mid-tower ATX chassis with something for just about everyone. The RGB-lit fans and tempered-glass side panels will appeal to gamers, and the chassis’ overall performance will keep performance enthusiasts happy. FORVery quiet Good thermal performance Triple tempered-glass side panels Includes four 120mm LED fans Aggressive price AGAINST Front glass is easy to drop Cheap filters Fingerprint magnet Features & Specifications Announced back in November, the FSP CMT510 mid-tower ATX chassis features RGB-lit fans, tempered-glass side panels on three of its six sides,What’s not to like? Let’s find out. RGB lighting and tempered glass are all the rage these days, so it seems only fitting that FSP’s latest mid-tower case has an abundance of both. It’s obvious that the company designed this chassis to showcase your system build, but the sheer amount of factory-installed RGB fans suggests a focus on cooling performance, as well. But before we get ahead of ourselves, let’s take a look at the exterior of the CMT510. The first thing you will notice about the FSP CMT510 is its sleek, stylish design. This mid-tower ATX chassis is constructed of steel and tempered glass and is painted black inside and out. The case measures 448x208x491mm (HWD), and it weighed in right at 16 lbs. The top of the chassis features a fan-mounting location in the rear portion of the panel that can accommodate 120mm or 140mm fans, but the 1.1” of space above the motherboard is too narrow for most all-in-one coolers and radiators. At the leading edge of the top panel, you will find two USB 3.0 ports, microphone and headphone jacks, power and reset buttons, and an RGB controller switch. Image 1 of 3
The left, right, and front panels on the CMT510 are all 4mm-thick tempered glass. The left and right side panels are held in place by rubber-coated locating pins and thumbscrews. The plastic feet on this chassis have a simple yet effective outcropping on the top that acts as a support for the glass side panel and prevents the panel from being accidentally dropped. The front glass panel is held in place by four thumbscrews that thread through the frame from the inside into brackets that hold the panel about 10mm away from the frame. We find it odd that, unlike the side panels, there is nothing keeping this panel from falling once the last screw is removed. Extra care is warranted when removing the front panel. Image 1 of 5 The bottom of the case has two filter-covered holes, one for the power supply, one for hard drive ventilation, as well as four large, rubber-coated plastic feet. The rear of the chassis is home to seven card slots, a motherboard I/O area, and an opening for a bottom-mounted PSU. Image 1 of 2 The fan filtration system on the CMT510 is basic, but, for the most part, it serves its purpose. The included filters will keep pet hair and larger debris out of your computer but do little to prevent finer dust particles from entering your system. Also, cleaning and maintenance require turning the entire chassis on its side to remove the filters on the bottom.
Hardware Installation & Test Configuration A plastic bag containing various screws, zip ties, and a PSU mounting plate comes attached to the frame of the chassis with a twist tie. The bag also contains the manual.
The interior of the FSP CMT510 is very spacious for a mid-tower. This chassis looks small from the outside, thanks to FSP's clever design choices (among them, moving most of the hard drive mounts behind the motherboard tray). But you can install just about any build you can imagine in this chassis. The seven expansion slots allow for multi-GPU setups, with cards up to 400mm in length. And you'll have room to spare for radiators and all-in-one coolers (up to 360mm long) in the front of the chassis.
An opening in the upper edge of the motherboard tray allows for routing through the 12V motherboard power cable or fan wires, and a larger hole facilitates heatsink changes without removing the motherboard. There are no traditional pass-through holes in the motherboard tray for cable management. FSP has instead opted for a two-piece motherboard-tray design that offsets both panels a bit, creating a vertical slot for routing cables. This design also provides 32mm of space behind the offset panel; here, FSP has included two 3.5" or 2.5" hard drive mounting locations. The area directly behind the motherboard is a bit tight at just 13mm, but there is still enough room for the fan controller and two 2.5" mounting locations for SSDs.
While we are on the subject of hard drive mounting locations, the CMT510 can accommodate a total of six hard drives. Two 2.5” drives can be installed on the top of the PSU tunnel, and two 3.5” drives and an additional two 2.5” drives can go behind the motherboard tray. FSP has done away with traditional slide-out drive trays, opting instead for stamped steel trays that are fastened to the chassis via thumbscrews.
FSP ATX Mid Tower PC Computer Gaming Case
It's a surprise to see a budget-friendly chassis like this one include a total of four 120mm LED-lit fans connected to an LED lighting controller. The lighting switch allows you to cycle through a number of different illumination effects, including static color, RGB circle, RGB smooth cycle, flash three colors, and flashing white. On the cooling side of things, the triple 120mm intake fans feeding a single exhaust fan should provide more than enough airflow for everything from mild to wild enthusiast PC builds. We'll see how all that airflow affects system temperatures a bit later in this review.
Radiators and all-in-one coolers up to 360mm can be installed in the front of the case. CPU air coolers up to 165mm in height can be equipped in this chassis. This chassis can also accommodate graphics cards up to 400mm.
The CMT510 has more than enough room for modern power supplies. We installed everything from a small 650W power supply (87x150x140mm, HWD) all the way up to Thermaltake's Toughpower 1500W power supply (99x150x220mm) without any fitment issues.
Test Configuration
Drivers & Settings
Chipset
Intel INF 10.1.1.42
CPU
3.8GHz (38x 100MHz) @ 1.2V Core
Motherboard
Firmware 7A78v17 (07/03/2017)
RAM
16-17-17-36
Graphics
Maximum Fan for Thermal Tests | AMD Radeon Crimson
ReLive 17.9.1
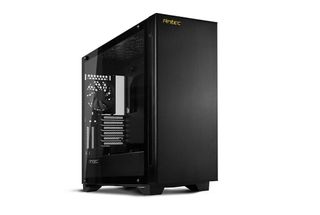
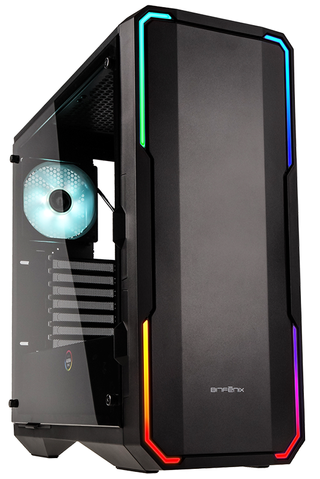
Benchmarks & Final Review Compared to similar cases such as the NZXT H700i, the Bitfenix Enso, the be quiet! Dark Base 700 and the Antec P110 Luce, this chassis falls right into the middle of the pack. We chose these cases for comparison purposes because they are of like size and feature set, and all have tempered-glass side panels. Antec P110 Luce TG Bitfenix Enso be quiet! Dark Base 700 The combination of three 120mm intake fans and a single 120mm exhaust fan provided more than enough airflow to keep system temps in check. Fan speeds were manually set at 1,400 RPM. Under full load, CPU core temperatures on our budget quad-core Intel Core i5-7500 processor running at 3.8GHz peaked at 40°C over ambient temperature (25°C) during testing. Graphics-card temperatures benefited the most from the airflow provided by the trio of 120mm intake fans. GPU temps leveled off at 51°C over ambient temperature.
System noise was kept to a minimum, thanks in no small part to the sheer amount of tempered glass on this chassis. In fact, the CMT510 has an acoustic profile almost identical to that of the Dark Base 700, the quietest case we've tested to date. If keeping noise levels low is at the top of your list of priorities, you'd be hard-pressed to find a quieter chassis.
Cooling efficiency and noise levels are both ways to measure performance. Determining acoustic efficiency, also referred to as "cooling-to-noise ratio," is a matter of averaging all five of our tests to determine a base value.
Normally, this is the point in the review where we tell you that our value chart doesn’t take features into account. But it should be obvious by now that, in addition to its solid thermal and acoustic performance, in the FSP CMT510 you are getting a whole lot of case for the $90 asking price. Indeed, the CMT510 is an interesting beast. It features tempered glass galore, good performance, and whisper-quiet operation. And it provides enough LED fans to satisfy the most ardent proponents of RGB case lighting. Overall, this is a great chassis for the money.
Product Name
CMT510 PLUS
Type
ATX Mid Tower
Color
Black
Materials
SECC, Tempered glass
Weight
10.89 kg/ 24 lbs
Dimension LxDxH(mm)
491 x 208 x 448mm /
19.15″ x 8.11″ x 17.47″
Warranty
2 Years
Maximum CPU Cooler Height
165mm
VGA Card Length
400mm / 15.75″
Expansion Slots
7
M/B Type
ATX, Micro ATX, Mini-ITX
I/O Panel
USB3.0 x 2, Audio,
Microphone
Power Supply Type
ATX
3.5′ Drive Bays
2
2.5′ Drive Bays
2
Cooling System
Front: 120mm x 3 ARGB Led
Fan
Rear: 120mm ARGB Led Fan
Fan&Water Cooler
Supply
Front: 120mm x 3 or 140mm
x 2, or 360mm x1 Radiator
Top: 120/140mm x 1
Rear: 120mm x1
Radiator Supply
360mmx1
An Even Closer Look… Holy mother of shine! Photographing this case proved quite difficult thanks to all the reflective surfaces, however we made due. The three tempered glass panels on the front and each side end up providing a unique glossy cube look which I’m really liking. If you’ve never owned a tempered glass case before, the first thing you’ll notice over traditional clear plastic is how much more reflective and smooth it looks. The tempered glass panels on the CMT510 Plus are smoked or tinted to reduce visibility inside the case by a fraction. The right-side panel is a bit darker than the rest as usually there’s not a whole lot going on over on that side anyways. Tinting the glass also makes the RGB lights stand out a bit more, so I’m definitely excited to see what this looks like powered on! Here’s a better view of the tempered glass edges. As you can see, it’s quite thick overall which really adds some heft to the case. Note: When dealing with tempered glass, be sure to handle the panels (and the case as a whole) with extreme care. While tempered glass (also known as safety glass) is incredibly strong, especially when it comes to withstanding surface impacts, the corners and edges are very weak. Knocking the corner into something could cause the entire panel to instantly shatter! It’s good to see FSP providing its users with proper front I/O panels, which seems to be a pattern we’ve seen with cases in the past. Many-a manufacturer these days take the minimalistic approach and neglect items such as 3.5mm jacks, and/or a reset button. The front I/O panel on this case pretty much has it all! The extra RGB button is used for toggling the RGB effects if you opt to use the built in RGB LED controller to manage these effects instead of the motherboard. Moving over to the right side… as you can see the panel is tinted a bit darker than the other two. This is good as this area is typically pretty messy cable-wise. The back of the case is pretty typical as to what you might find on most cases. Probably the only noteworthy mention is the expansion slot cover. In order to gain access to the expansion slots, a pre-cover needs to be removed which is held on by two screws. This can be seen in the image below (right). Located at the bottom is the power supply mounting area. The PSU is installed by installing a bracket onto the PSU first, and then sliding it in through the rear. The top of the case features a single 120/140mm fan mount which can either house a single radiator. As someone who traditionally runs a 240mm radiator on the CPU I was a little disapointed that option isn’t available as it seems like it would have been a simple modification. The option to mount a larger radiator is still available at the front of the case, however it will cover up those RGB fans from the inside. As you can see, located at the bottom of the case is an option for another 120mm fan (right) in addition to the PSU intake (left). Hardware Installation Now let’s throw some hardware at this case! The hardware I used for this mid-range build is as follows: Processor: AMD Ryzen 2600X CPU Cooler: Corsair Hydro Series H60 Memory: 8GB Corsair Dominator Pro Motherboard: ASUS ROG Strix B450-F Gaming Power Supply: FSP Hydro GE Series 650W Installing hardware into the FSP CMT510 Plus is a breeze with a few noteworthy mentions. First, installing the PSU is a bit different than most other cases. The power supply requires an included bracket to be installed onto the PSU first and THEN installing the whole thing into the case. This was my first case installing 3.5″ HDD’s in such a fashion so I figured I’d give it a go by throwing a spare HDD I had laying around into the build. I actually really like this method compared to the traditional slide lock method we typically see. It clears up a ton of space next to the power supply for routing cables or attaching or detaching PSU modular cables. The reverse side of the build (don’t judge me too harshly): And behold the front with the RGB’s on! Man those fans look good. Sorry about the random USB 3.0 connector flopping in the wind. =/ With the tempered glass panels reinstalled, the build got even better. I love the glossy, sleek look the case projects. The only down side are the fingerprints… I feel like you’ve got to keep a microfiber cloth on standby all the time to keep it looking pristine! Here’s a close up with the fans. At this point, feel free to play around with the case’s built in RGB lighting effects! There were at least 30 of them from what I could tell, so have fun! With the system powered on, the fans were barely audible, however I couldn’t find a way to manage the speed. I’m not sure if this happens automatically or if the fans run at a single static speed. They moved a decent amount of air all together, so at their current speed the fans should move enough air for most builds while remaining silent. Final thoughts and Scoring Alright, this brings us to the final category of the review! At this point we break down how this case did based on several categories. Overall, the FSP CMT510 Plus was probably one of the best looking cases I’ve had the pleasure of reviewing. My only wish was that there was some way to control the fan speeds. A knob or something on the RGB controller would have been a fantastic addition.
Pros:Looks Great 4 Addressable RGB Fans and Controller Included Two Tempered Glass Panels Good Value Cons:No USB Type-C Port Restricted Airflow To Front Fans


Post a Comment